
Introduction to 3D Furniture Rendering Mistakes
In today’s competitive furniture design and interior visualization market, realism is the ultimate goal. A natural-appearing 3D render not only gratifies customers, but increases sales, marketing, and product credibility as well. However, achieving this level of accuracy isn’t always easy. Even an experienced 3D artist or professional makes mistakes with common pitfalls which make their images flat, fake, or unbelievable.
From poorly lit rigs to inappropriate materials, these mistakes can potentially break the illusion of realism and end up costing time, money, and reputation. The silver lining? The overwhelming majority of these traps are avoided with the right workflow, equipment, and detail awareness.
In this guide, we will reveal the top 10 most common 3D furniture rendering mistakes that kill realism—along with, importantly, show you how to fix them. Avoiding these 3D furniture rendering mistakes now will save professionals hours of rework.
Mistake 1: Insufficient Client Brief and Requirements
One of the biggest mistakes comes before any work has begun: a poor or insufficient client brief. Fuzzy measurements, blurry expectations, or incorrect mood references are all familiar leads for wasted revisions.
How to Fix It
- Develop a structured questionnaire for clients.
- Request reference images, CAD drawings, or blueprints.
- Use mood boards to align visual expectations early.
Mistake 2: Inappropriate Scale and Proportions of Furniture
Even a well-crafted chair looks wrong if it has also been proportioned poorly. Off-balance proportion undermines realism and violates composition.
How to Fix It
- Always cross-check dimensions against manufacturer specs.
- Import CAD files for accuracy.
- Place models in realistic room contexts to verify proportions.
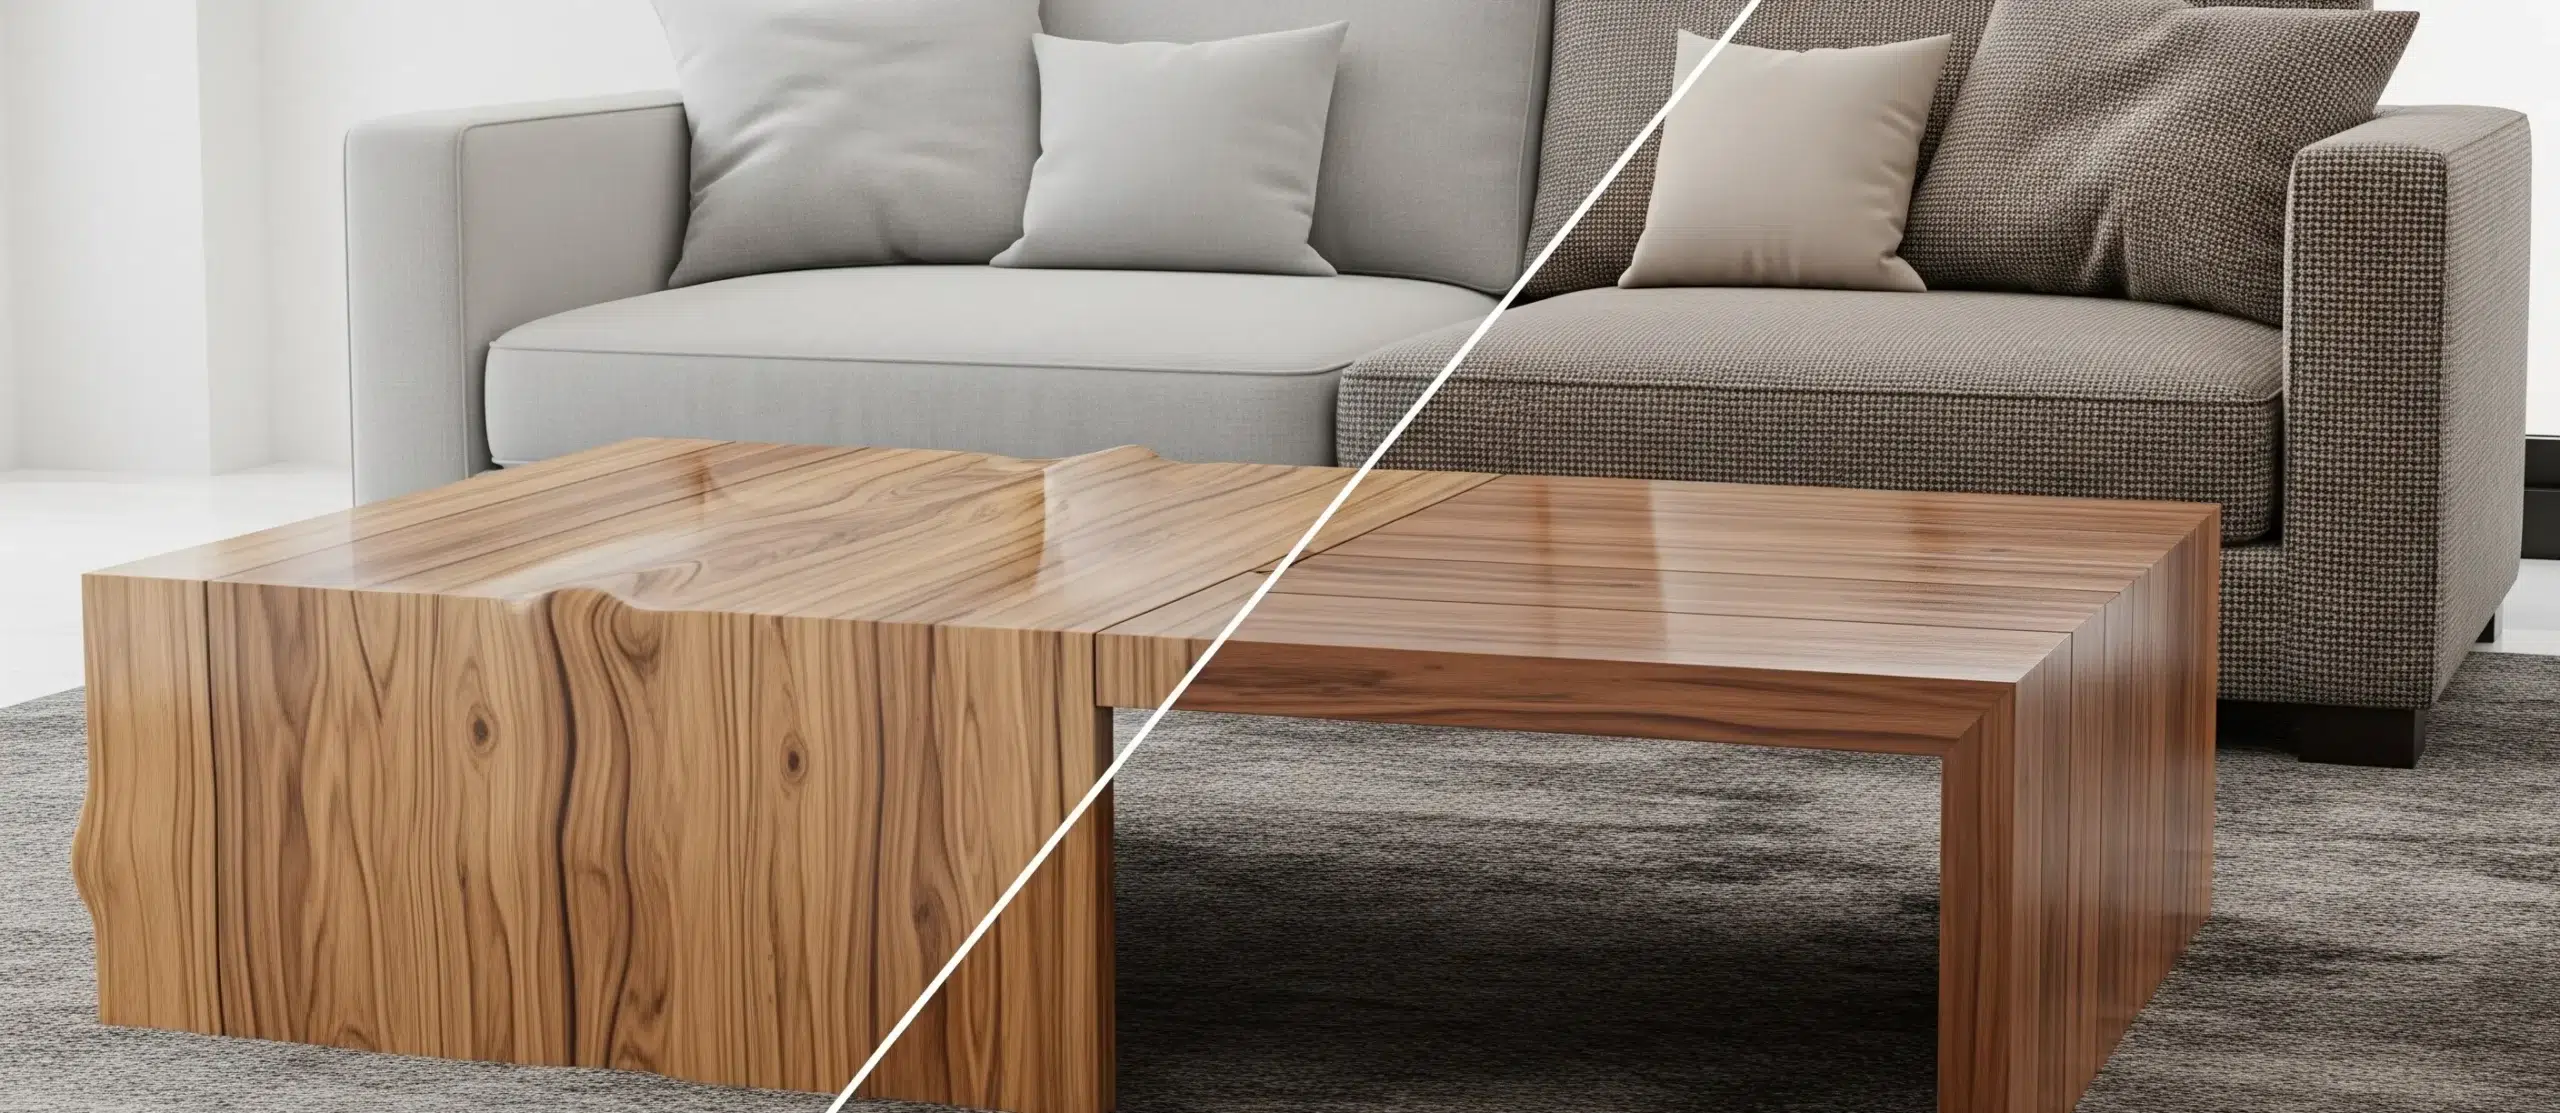
Mistake 3: Poor-Quality or Inappropriate Textures
Flat, blurry, or incongruent surfaces are an immediate turn-off for poor rendering. A pixelated-grained wooden table or cloth that won’t reflect light properly kills realism.
How to Fix It
- Use high-resolution PBR (Physically Based Rendering) textures.
- Master UV mapping to avoid stretching.
- Build a material library with verified surface properties.
Among all 3D furniture rendering mistakes, texture issues are the easiest to spot and the hardest to ignore.
Mistake 4: Unrealistic Lighting Setup
Lighting can make or break a render. Overexposure of scenes, intense shadows, or dull lighting quickly takes away from realism.
How to Fix It
- Use HDRI environments for natural daylight.
- Apply three-point lighting techniques for product shots.
- Add soft shadows to mimic real-world conditions.
For a deeper dive into professional lighting and rendering workflows, you can check out this excellent resource from Chaos
Mistake 5: Unfavorable Camera Angles and Composition
In poorly chosen angles, the object will get flattened and hide prominent design details.
How to Fix It
- Follow real-world photography rules (rule of thirds, symmetry).
- Stick to eye-level or slightly above for furniture renders.
- Test multiple compositions to find the most dynamic frame.
Mistake 6: Ignoring Material Accuracy
Materials as varied as wood, leather, glass, or steel all react differently with light. Faking them violates authenticity.
How to Fix It
- Adjust reflectivity, glossiness, and bump maps carefully.
- Compare renders against real samples or manufacturer catalogs.
Mistake 7: Overlooking Scene Context
Furniture that hangs suspended in an empty room looks clinical. A set with no props and interior detail looks unalive.
How to Fix It
- Add contextual elements like rugs, plants, or decor.
- Focus on lifestyle staging to tell a story.
- Keep balance—avoid clutter that distracts from the furniture.
Mistake 8: Noise, Grain, & Low-Resolution Renders
Grainy renders scream amateur work. ow resolution produces fuzzy details.
How to Fix It
- Increase sample rates and use AI denoising tools.
- Render at minimum 2K resolution for professional projects.
- Leverage cloud render farms for faster, high-quality outputs.
Mistake 9: Not Optimizing Rendering Workflow
Ill-optimized scenes with dense geometry take forever to render, causing wasted time and computer resources.
How to Fix It
- Use proxy models and instancing for repeated elements.
- Break renders into layers/passes for faster editing.
- Keep file structures organized with naming conventions.
Mistake 10: Neglecting Feedback and Revisions
Delivering final renders without client feedback often leads to costly revisions.
How to Fix It
- Share draft renders for early input.
- Use collaboration tools for feedback tracking.
- Maintain version control to avoid confusion.
Quick Reference: Common 3D Furniture Rendering Mistakes vs. Fixes
Mistake | Impact on Realism | How to Fix It |
Poor Client Brief & Requirements | Misaligned expectations, multiple revisions | Use structured questionnaires, mood boards, and reference files |
Incorrect Scale & Proportions | Furniture looks distorted or unnatural | Cross-check dimensions with CAD/blueprints; test in real room contexts |
Low-Quality or Wrong Textures | Surfaces look flat, pixelated, or fake | Use high-res PBR textures, proper UV mapping, and verified material libraries |
Unrealistic Lighting Setup | Overexposed, dark, or dull renders | Apply HDRI daylight, three-point lighting, and soft shadows |
Bad Camera Angles & Composition | Weak presentation, poor storytelling | Use photography rules (rule of thirds, symmetry), eye-level shots |
Ignoring Material Accuracy | Woods, metals, or fabrics look off | Adjust reflectivity & gloss; compare with real samples |
Overlooking Scene Context | Renders feel empty or sterile | Add props, staging, and storytelling while avoiding clutter |
Noise, Grain, & Low-Resolution Renders | Unprofessional, low-detail output | Increase samples, use AI denoising, render in 2K+ resolution |
Not Optimizing Workflow | Slow render times, wasted resources | Use proxies, instancing, render passes, and file organization |
Skipping Feedback & Revisions | Extra rework, delayed delivery | Share drafts early, collect feedback, and maintain version control |
Conclusion
It requires more than technical knowledge to create realistic 3D renderings of furniture—attention to detail, proper workflows, and collaboration with clients. Avoid these 10 pitfalls and you’ll always get professional, photorealistic images that impress your clients and set your work apart.
If you want flawless 3D furniture renders without the trial-and-error, consider partnering with experienced rendering specialists who can bring precision and artistry to every project.
Want to see the complete 10-step process? Check out our [3D Furniture Rendering Guide].