Introduction to Photorealistic 3D Exterior Rendering
Architectural drawings, plans, and BIM models communicate the technical aspects of a project, but they don’t always help clients, investors, or stakeholders visualize the final result. This is where 3D exterior rendering becomes valuable.
A well-executed exterior render can transform a concept into a realistic visual representation, making it easier to communicate design intent, evaluate decisions, and market projects before construction begins. However, creating convincing architectural visualizations involves much more than applying materials and rendering an image.
In this guide, we’ll explore key considerations that contribute to realistic exterior renderings and share practical 3D Exterior Rendering Tips that help architects and designers improve realism, clarity, and overall presentation quality while avoiding common visualization mistakes.
Understanding the Concept of Photorealism in Architecture
Photorealism is the art of making 3D renderings look like real-world photographs. In architectural visualization, it requires precise control over light, material properties, and environmental context. The goal is to create images that not only look realistic but also evoke emotion and tell a story about the building’s atmosphere and functionality.
Why Exterior Rendering Matters in Architecture
Exterior renderings serve as a bridge between technical documentation and visual communication. They help architects present ideas in a format that clients can easily understand, regardless of their design or construction knowledge.
Beyond presentations, renderings are frequently used for planning approvals, investor pitches, marketing campaigns, real estate listings, and project development materials. High-quality visuals can also help identify design issues early, allowing teams to evaluate materials, proportions, and site relationships before construction begins.
As architectural projects become more competitive, realistic visualizations have become an important tool for communicating value and building confidence among stakeholders.
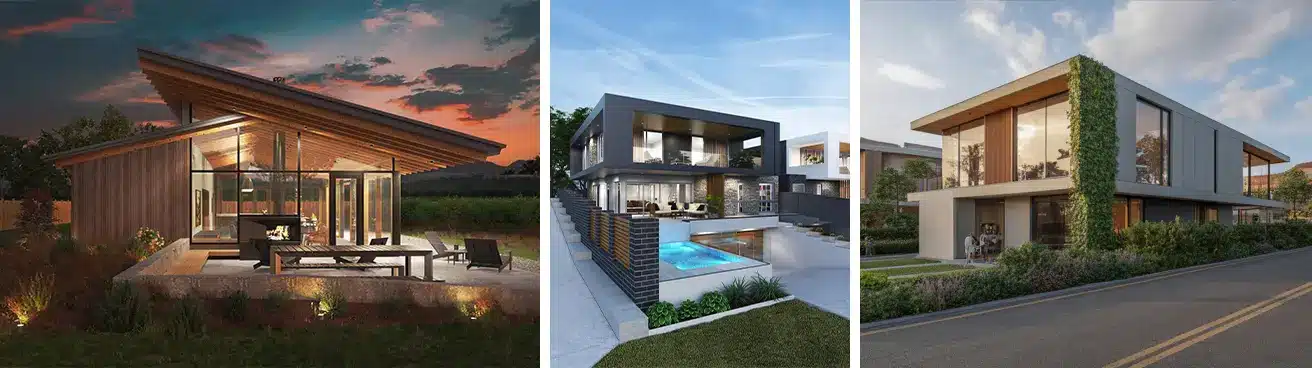
What Makes an Exterior Render Look Realistic?
Photorealistic rendering is often associated with advanced software, but realism is primarily the result of careful decisions throughout the visualization process.
Accurate Materials
Materials play a major role in how a building is perceived. Even a well-modeled structure can appear artificial if materials do not react naturally to light.
Exterior materials such as brick, concrete, wood, stone, glass, and metal should reflect real-world characteristics, including texture, reflectivity, roughness, and weathering. Small details often have a significant impact on the overall believability of a scene.
Natural Lighting
Lighting is one of the most important factors in architectural visualization. It defines form, reveals material qualities, and influences the overall mood of the image.
Natural sunlight creates depth through highlights and shadows, helping architectural details stand out. The position of the sun, cloud coverage, and atmospheric conditions should be considered carefully, as they can dramatically change the appearance of a building.
Environmental Context
Buildings rarely exist in isolation. Roads, landscaping, neighboring structures, terrain, and surrounding infrastructure help place a project within a believable setting.
Including appropriate context not only improves realism but also helps viewers understand how the project relates to its environment. Contextual elements can also provide important scale references that make architectural proportions easier to interpret.
Scale and Human References
Accurate scale is essential in exterior rendering. People, vehicles, outdoor furniture, and landscape elements help viewers understand the true size of a building and its spaces.
Without these references, even well-designed projects can feel disconnected from reality. Thoughtful placement of scale elements helps create more relatable and engaging visualizations.
These 3D exterior rendering tips help architects improve realism, composition, and lighting consistency across projects.
The Exterior Rendering Workflow
Understanding the rendering process can help architects prepare projects more effectively and achieve better results.
1. Project Review and Preparation
The workflow typically begins with architectural drawings, CAD files, BIM models, or SketchUp files. Before visualization starts, the model is reviewed and optimized to ensure clean geometry and accurate proportions.
2. Material and Asset Development
Once the model is prepared, materials are created and assigned based on design specifications. Additional assets such as vegetation, site furnishings, vehicles, and people may also be introduced to support the overall composition.
3. Scene Development
The environment is then constructed around the building. This stage may include landscaping, terrain adjustments, surrounding structures, and atmospheric elements that help establish context.
4. Lighting and Camera Setup
Lighting and camera placement are carefully developed to highlight key architectural features. Multiple views are often explored before selecting the final composition.
5. Rendering and Post-Production
The final stage involves rendering high-resolution images and refining them through post-production. Adjustments to contrast, color balance, atmospheric depth, and visual clarity help create polished presentation-ready visuals.
Essential Tools and Software for 3D Exterior Rendering
3ds Max: The Architect’s Go-To Platform
For professional architectural visualization, 3ds Max is the industry standard. Combined with powerful render engines, it allows architects to create highly photorealistic exterior renders.
V-Ray for 3ds Max – Delivers precise lighting, material control, and realistic shadows, perfect for detailed architectural scenes.
Corona Renderer – Smooth, photorealistic results with minimal setup, ideal for high-quality exterior visuals.
Arnold – Built into 3ds Max for advanced lighting and shading, handling complex exteriors effortlessly.
Enscape – For real-time visualization and quick client presentations directly from 3ds Max.
Using 3ds Max as your core platform ensures a flexible, professional workflow for every step of your exterior rendering project.
Hardware Requirements for Efficient Rendering Workflow
Rendering can be computationally intensive. A workstation with a multi-core CPU, high-end GPU (e.g., NVIDIA RTX series), and ample RAM (at least 32GB) ensures smoother workflow and reduced render times. SSD storage and cooling optimization further enhance performance during heavy scene processing.
Choosing the Right Time of Day
The time of day can significantly influence how an architectural project is perceived.
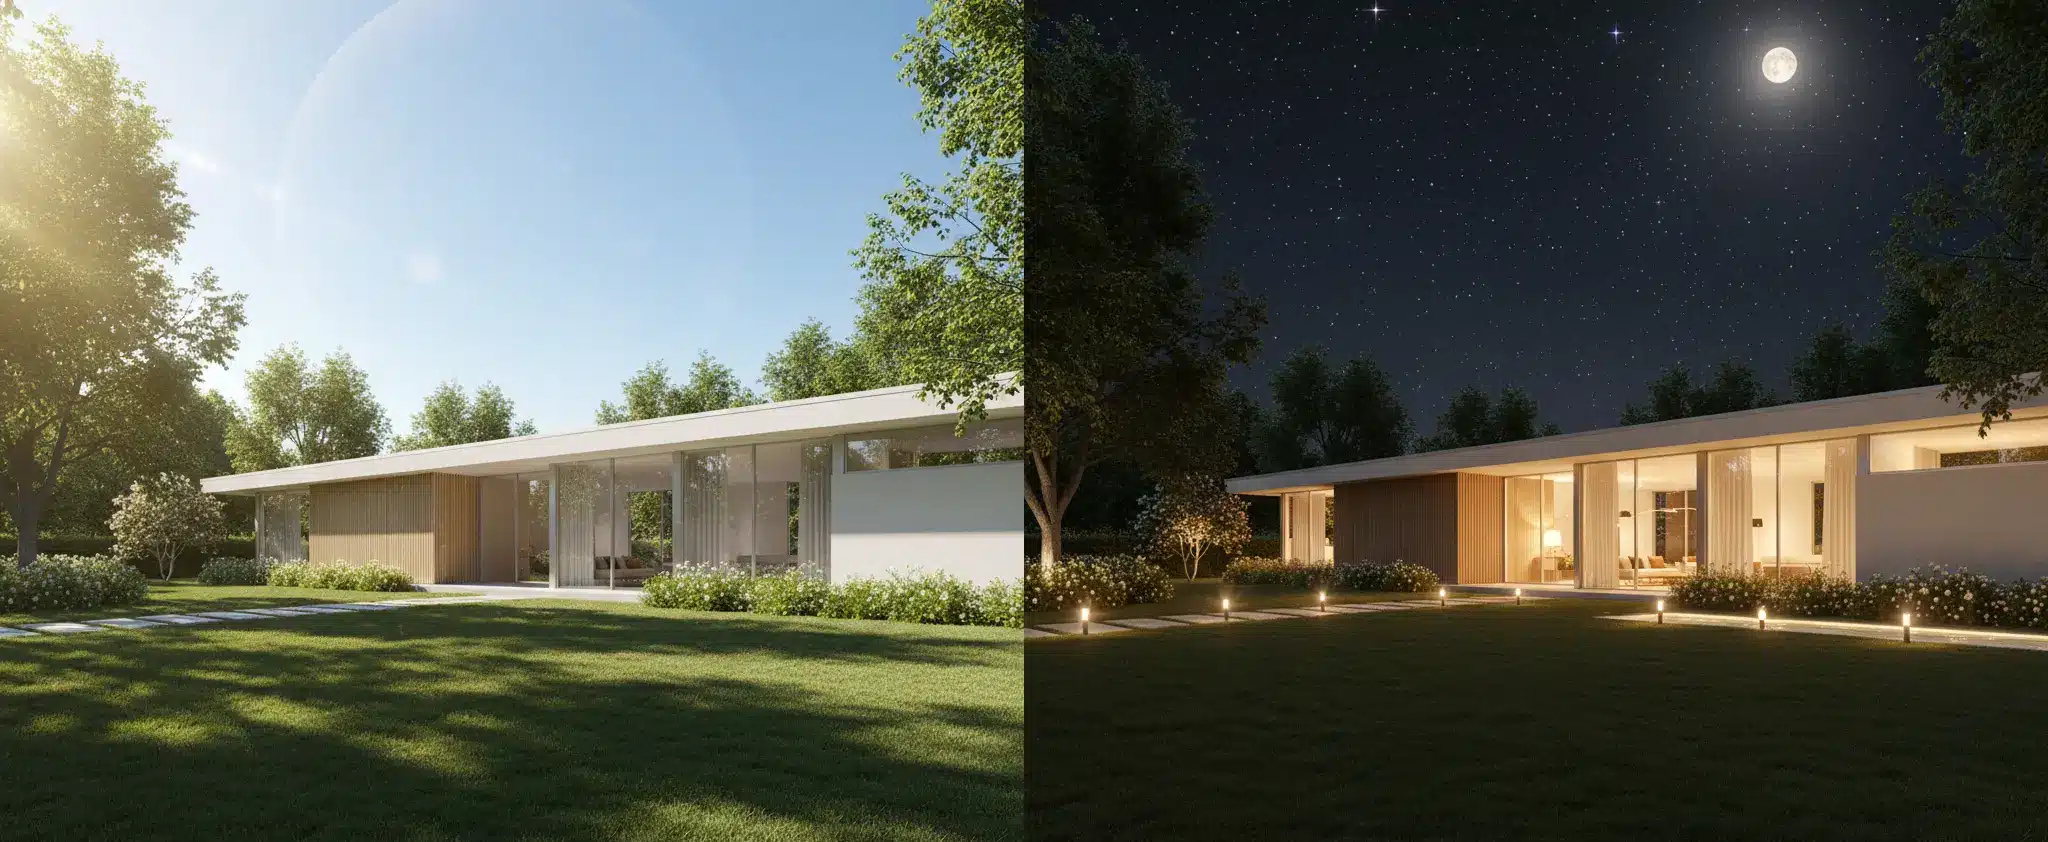
Daytime Rendering
Daytime renders provide maximum visibility of materials, forms, and architectural details. They are commonly used for design reviews, planning approvals, and technical presentations.
Golden Hour Rendering
The period shortly after sunrise or before sunset creates warmer lighting and longer shadows. This often adds depth and visual interest, making projects feel more inviting and visually appealing.
Dusk and Night Rendering
Nighttime visualizations are particularly effective for showcasing architectural lighting, illuminated interiors, and landscape lighting design. They can create a dramatic atmosphere while highlighting features that may not be as noticeable during daylight hours.
Composition and Camera Settings for Exterior Renders
Camera placement plays a direct role in how a building is interpreted. A technically correct render can still feel weak if the composition is not carefully planned.
Architectural composition is not about artistic exaggeration—it is about presenting the design in a clear and readable way.
Perspective and Focal Length
Wide focal lengths can distort proportions, while overly tight framing may reduce spatial understanding. The goal is to choose a perspective that represents the architecture accurately while still feeling visually engaging.
Framing Key Architectural Elements
Strong compositions guide the viewer’s attention toward the most important design features, such as entrances, façade structure, material transitions, or spatial hierarchy.
Visual Balance
A well-composed render maintains balance between architecture, foreground elements, and background context. This helps create a natural visual flow instead of a flat presentation.
Post-Production Techniques for Realistic Results
Post-production is not about “fixing” a bad render—it is about refining and polishing an already well-executed image.
Color Correction, Contrast, and Tone Mapping
Post-production refines your render. Tools like Adobe Photoshop or Affinity Photo allow color balancing, exposure adjustments, and contrast enhancement. Avoid over-processing—subtle improvements retain authenticity.
Integrating Real-World Backgrounds and Environments
Merging the rendered model with actual site photography or HDRI backgrounds anchors the design in a believable environment. Ensure that color temperature, lighting direction, and shadows align between 3D and photographic elements.
Common Mistakes in Exterior Rendering (and How to Avoid Them)
Even well-planned architectural visualizations can lose realism due to small but critical mistakes in execution.
Weak or Flat Lighting Setup
Without proper lighting direction and intensity, architectural forms appear flat and lack depth. Good lighting should emphasize structure, not just illuminate the scene.
Unrealistic Vegetation and Environment
Low-quality or incorrectly scaled vegetation can immediately break realism. Environmental assets should match the geographical and architectural context of the project.
Scale and Proportion Issues
Incorrect scaling of people, vehicles, or surrounding elements can make an otherwise accurate building feel unrealistic or disconnected from reality.
Over-Saturated or Artificial Color Grading
Excessive color correction often results in unrealistic visuals. Architectural renders perform better when tones remain natural and grounded.
Lack of Environmental Context
Buildings presented without surroundings often feel incomplete. Even minimal context elements can significantly improve visual credibility.
How to Improve Exterior Render Quality
High-quality exterior rendering is less about tools and more about decision-making at every stage of production.
One of the most effective ways to improve results is consistency—maintaining controlled lighting conditions, accurate materials, and coherent composition across the entire scene.
Another key factor is observation of real-world references. Studying real architectural photography helps identify how light behaves on surfaces, how shadows soften over distance, and how environments naturally interact with structures.
Finally, iteration is essential. The best results rarely come from a single render pass but from refining composition, materials, and lighting through multiple adjustments.
When to Outsource Exterior Rendering
Architects often choose to outsource visualization when project timelines are tight or when high-end presentation quality is required.
Professional rendering studios bring experience in lighting, composition, and material realism that can significantly improve final output quality.
Outsourcing is especially useful for:
- Large residential or commercial developments
- Marketing and investor presentations
- Projects requiring multiple visualization styles
- Tight delivery deadlines
A good rendering partner not only produces images but also helps refine how a project is visually communicated.
Recommended Resources and Professional Communities
Best Online Platforms for Architectural Visualization Learning
Websites like CG Architect and ArchDaily provide tutorials, project showcases, and software updates. Continuous learning ensures professionals stay current with industry advancements.
Forums and Peer Networks for Rendering Professionals
Joining forums like Evermotion or CGSociety helps professionals exchange feedback and discover advanced rendering techniques shared by top visualization artists.
Conclusion: Elevate Your Architectural Visualizations with Precision
Mastering photorealistic 3D exterior rendering is a journey of precision and creativity. From choosing the right tools and lighting to refining post-production details, each step enhances the realism of your architectural presentation. As architects embrace digital visualization, those who perfect photorealism will continue to inspire and lead the industry.